Mechanical drawing, this is the foundation that robots must master
2021.04.13
(1) Projection principle and three views
1. Basic knowledge of projection
1) Center projection: The light source is emitted from the projection center.
2) Orthographic projection: When the projection rays are parallel to each other and perpendicular to the projection surface, the projection of the object on the projection surface is called orthographic projection.
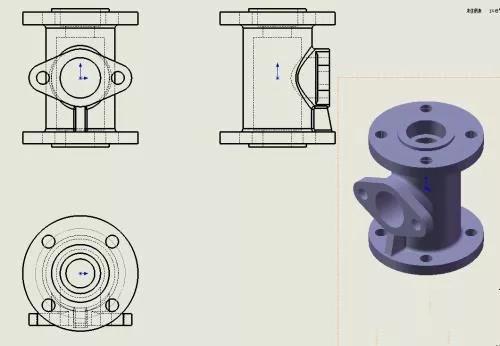
2. Three views
The view composed of the three main projections of the object, and the orthographic engineering drawing (the three basic views of the front view, the top view, and the left view) that can correctly reflect the length, width, and height of the object is a three-view. The geometric shape of an object is a conventional abstract expression.
1) Main view
Choose the most obvious direction that reflects the characteristics of the object as the projection direction of the main view.
2) Top view
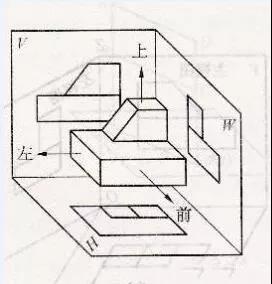
3) Left view
4) Expand the projection surface to sum up
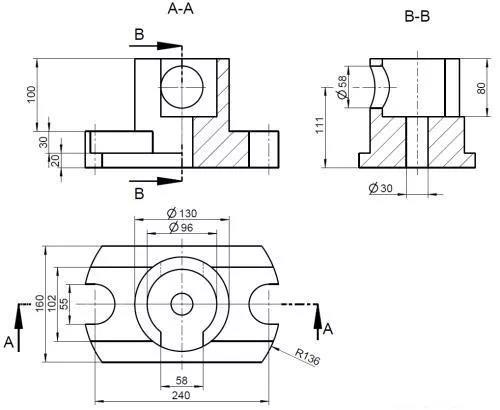
The projection law is:
a. Main and top view: Long alignment
b. Main and left view: high and flat
c. Top and left view: equal width
Simply summarized as: the length is aligned, the height is flush, and the width is equal.
5) Projection characteristics of planes and straight lines on the object
a. Tilt to the projection surface-shrinkage
b. Perpendicular to the projection plane—accumulation
c. Parallel to the projection plane-authenticity
(2)Various expression methods of parts
There are several ways to express the shape of a part:
1. Basic View
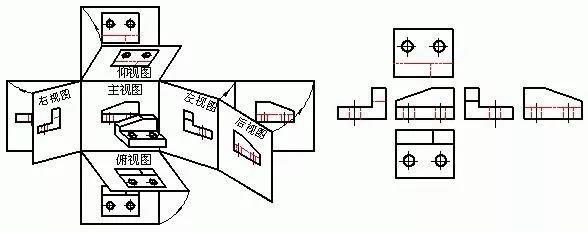
Basic views include front view, top view, left view, right view, bottom view, and back view.
The basic view is placed on a drawing. If it is placed according to the expanded position of the basic view, the name of each view is not marked, otherwise the view name "X direction" should be marked on the top of the view, and an arrow should be used near the corresponding view. Projection direction, and add the same letters.
2. Oblique view
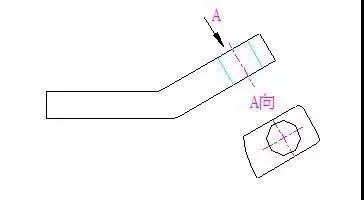
When the surface of the part is inclined to the projection surface, an auxiliary projection surface parallel to the surface of the part is added and the view obtained by projection is called an oblique view.
3. Partial view
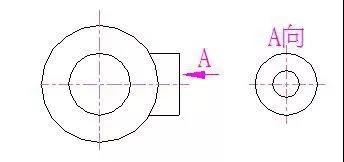
The view obtained by projecting a certain part of the part to the basic projection surface is called a partial view.
4. Rotate the view
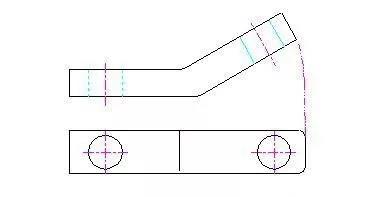
When the inclined part of the part has an obvious axis of rotation, it can be imagined that the inclined part is rotated to be parallel to a certain selected basic projection plane before projecting onto the projection plane.
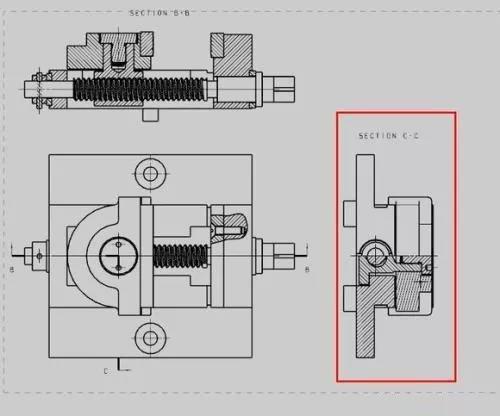
5. Sectional view
The internal structure of the part is complicated, and the dotted lines in the view will also increase. It is not easy to see the picture. It is assumed that the part is cut with a cut surface, and the cut part is removed and then projected.
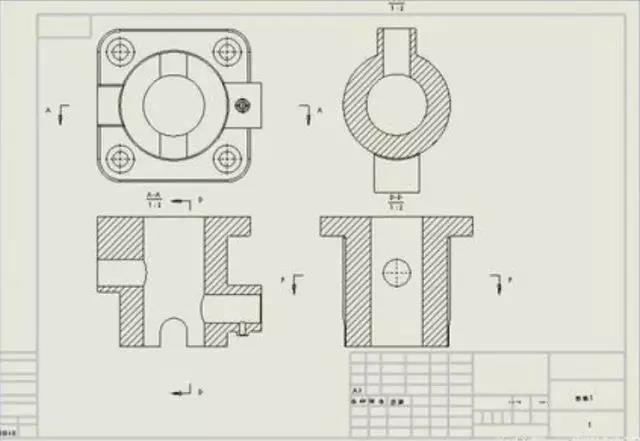
1) Half section view: used to express the shape and internal structure of the object with a plane of symmetry (delimited by a line of symmetry)
2) Partial cross-sectional view: used to express the local internal shape of the object and retain most of the shape of the object (partial cut)
3) Ladder sectioning: several parallel section planes for step sectioning
6. Coincident section
The cross-sectional shape used to express the local structure of an object.
7. Partial enlarged view
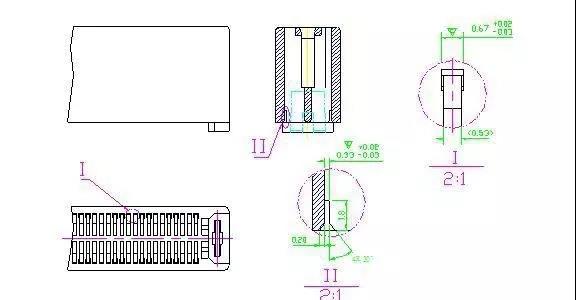
(3)The basic steps of drawing
1. Determine the map frame and drawing scale (product size and structure);
2. Lay out the frame according to the specified size requirements;
3. View planning: According to the product size and structural complexity, plan the view distribution, especially the number and distribution of cross-sectional views, technical requirements, and leave space for the title bar;
4. Product analysis and drawing;
5. Dimensioning.
Previous:Why do precision machine tools have to manually shovel flowers?
Next:Why do German workers work 6 hours a day, but no one can beat the manufacturing industry!
Related Information
- Industry news
- The tap or drill bit breaks in the hole, how to fix it?
- Why do airplanes use rivets instead of welding?
- Why are engineering drawings all blueprints?
- How is a ping pong ball made? It turns out that it is made of two pieces of plas
- What to do if quality is abnormal? Doing these 3 things well is the key!
- Weekly News 9.7-9.13
- Huawei's three-fold screen is approaching, and the domestic supply chain is wait
- Innovative application of digital twin technology in integrated die-casting prod
- 5 types of carbide cutting tools, what are the differences? Save this article an
- Global manufacturing PMI in June was 49.5% | Weekly News 7.6-7.12
- Raw material defects | Machining special operations and practical cases 109
- No wonder Toyota stamping is so good: a day in the life of a Toyota stamping sho
- Analysis on the development trend and demand of China's mold industry
- How many types of sealing rings are there in machinery? What are they used for?
- Hangfa, Hangfa, a scar on the hearts of machine processing workers
- How to mill a large arc surface with a small cutter?
- Dynamics of the processing center of the process! What is the fundamental reason
- 500 ° C ultra -strong aluminum alloy! This problem is overcome
- How much do you know about the hometown of machine tools and molds, how much do

 BACK
BACK MT HOME
 Navbar